Can I Replace Just the Headlight Lens?
Understanding Automotive Lamp Sealing Methods
Recently, a customer wanted to replace the original clear lens on his vehicle with one of our crystal lenses. When he asked whether the lens could be removed, my answer was simple:
“It is technically possible, but highly discouraged.”
However, the customer was puzzled. He noticed screws on the lamp assembly and asked, “If there are screws, why can’t I simply remove the lens?”
This is actually a very common question, and the answer lies in understanding how automotive lamps are assembled and sealed.
Why Modern Lamps Are Different
If you’ve noticed, vehicle lamps from decades ago were generally simple and boxy in design. Most headlights and taillights looked similar and prioritized practicality over styling.
Today’s vehicles are very different.
Modern headlights feature sophisticated shapes, LED technology, split-headlight designs, and intricate internal structures. Taillights have evolved into stylish full-width light bars and highly customized designs that play a major role in a vehicle’s appearance.
As lamp designs became more complex, manufacturers also developed more advanced sealing technologies to improve durability and water resistance.
Waterproof Performance vs. Repairability
Over the years, automotive lamp sealing methods have evolved significantly:
- Screw-fastened assemblies
- Butyl rubber sealing
- Ultrasonic welding
Each generation improved water resistance and manufacturing efficiency, but often at the cost of repairability.
In the past, if only the lens was damaged, vehicle owners could replace the lens alone at a relatively low cost.
Today, even replacing a single OEM headlamp can easily cost over USD 1,000. Because of these high replacement costs, many vehicle owners choose aftermarket parts as a more economical solution.
Three Common Lamp Sealing Methods
To better understand whether a lamp can be repaired or disassembled, let’s examine three common sealing methods used in the automotive industry.
1. Screw-Fastened Assembly
How It Works
The lens and housing are mechanically secured together using screws. The screws compress the components to create a seal.
Advantages
- Low manufacturing cost
- Lens can often be replaced separately
- Easy to repair
- Replacement lenses are usually available
Disadvantages
- Higher risk of water leakage
- Limited design flexibility
- Less suitable for modern lamp styling
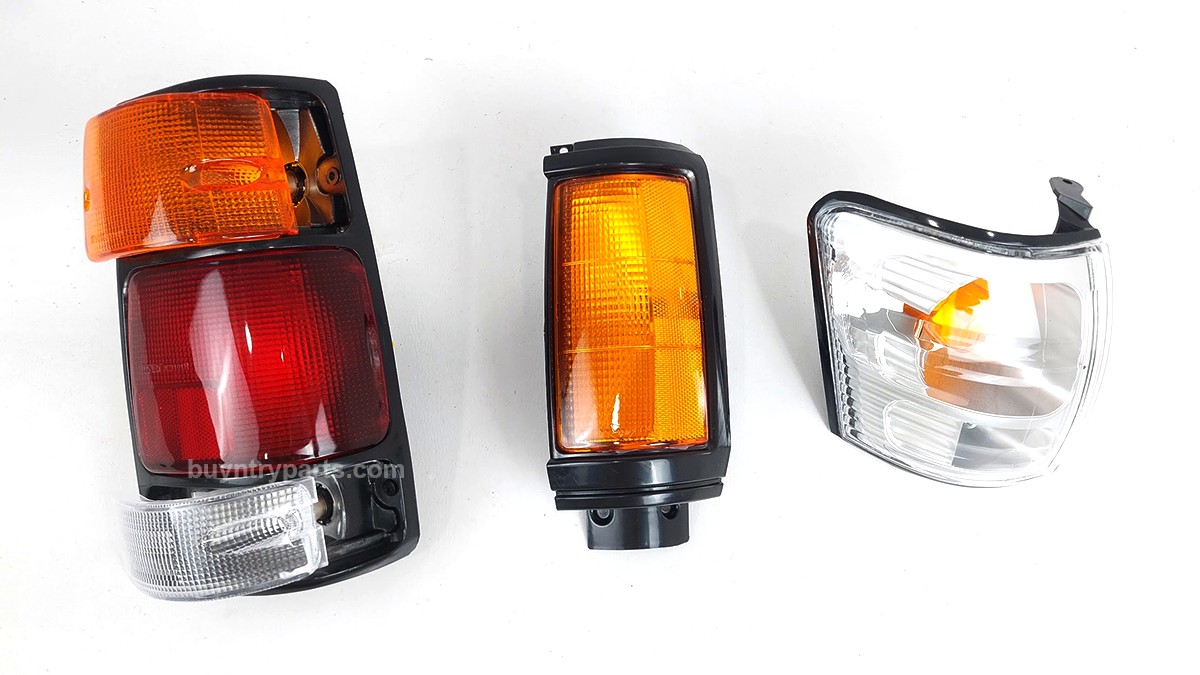
Example
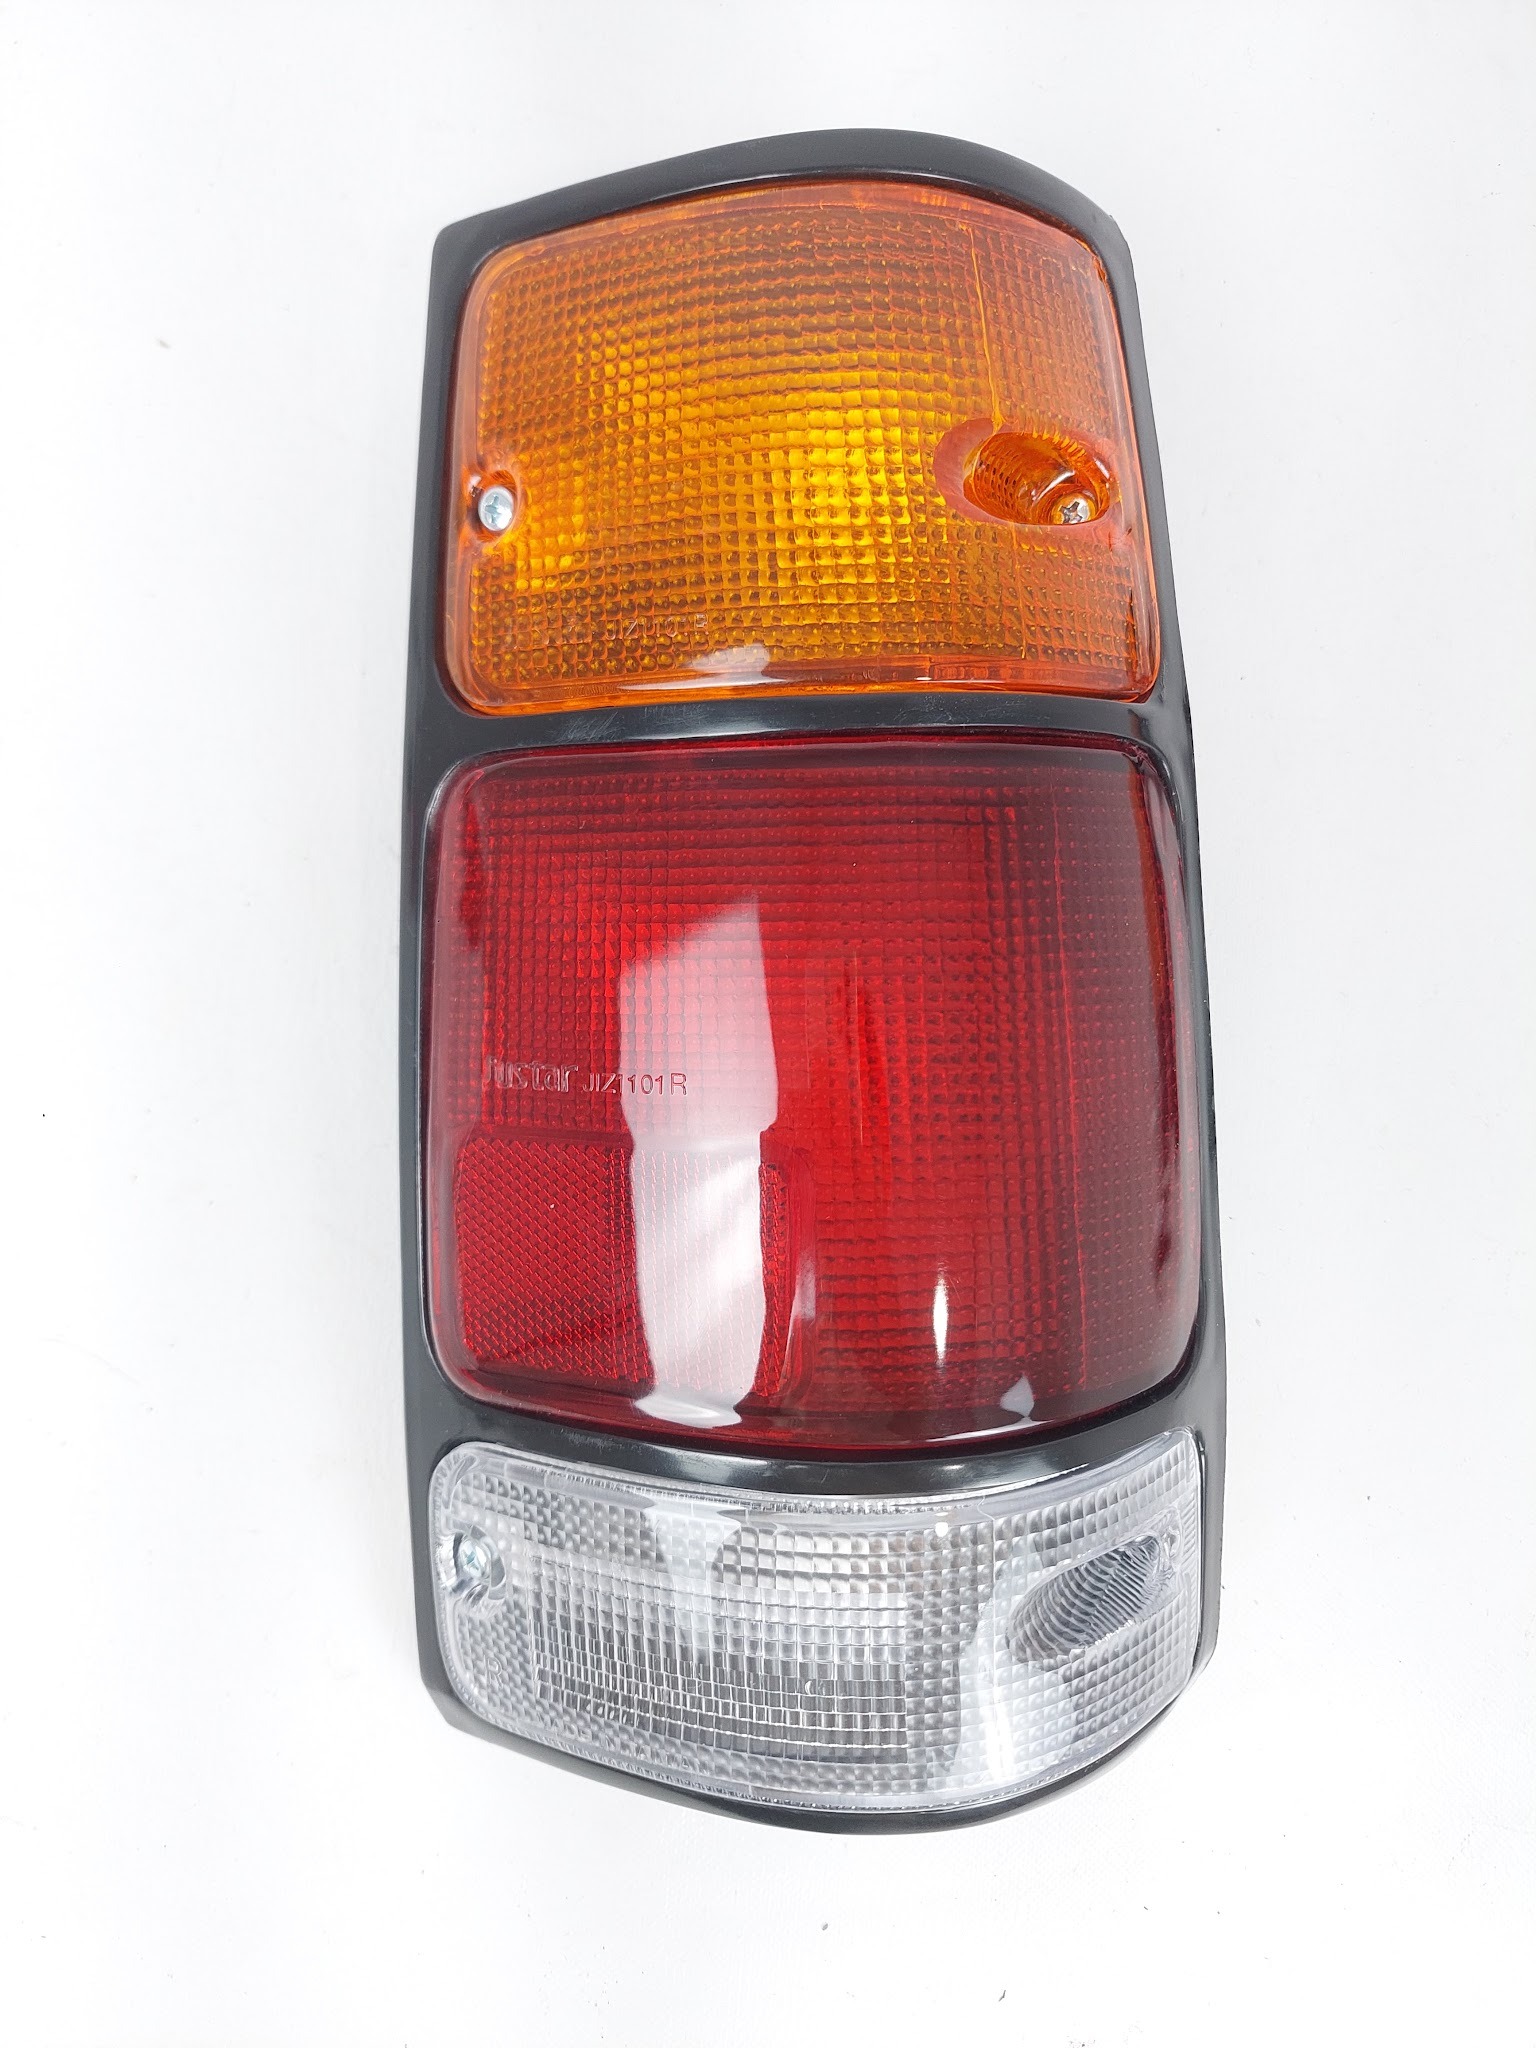
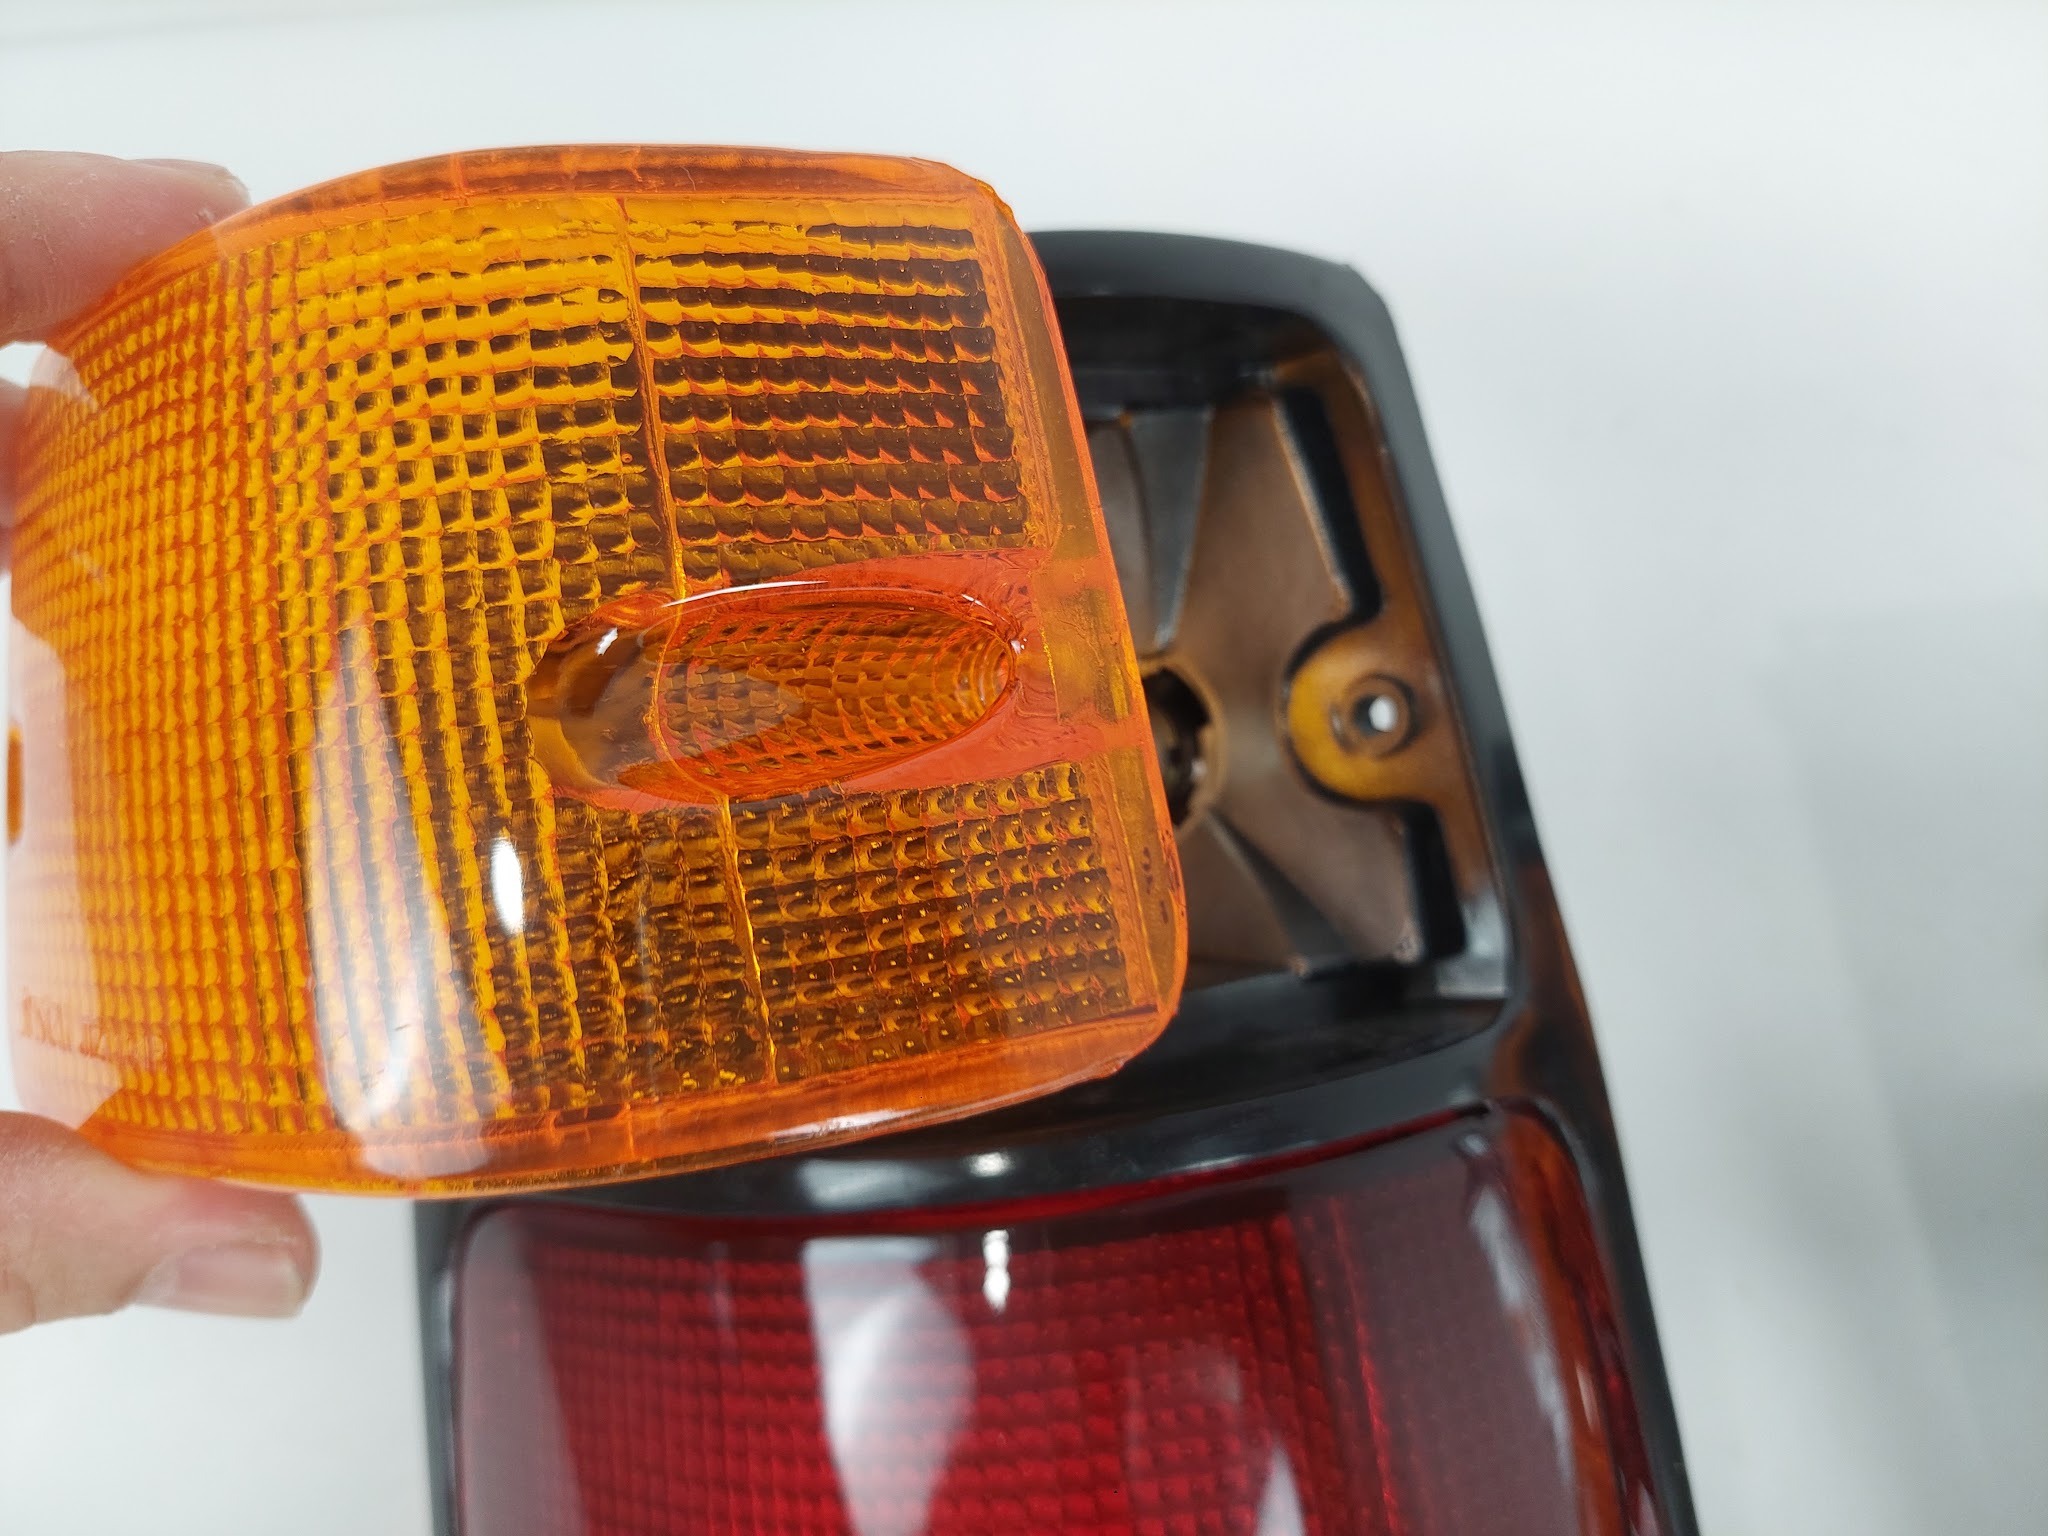
Isuzu Rodeo 1988–1997 Tail Lights
OEM Numbers:
- 8-94482-359
- 8-94482-358
In this design, the lens sits inside a recessed groove and is secured with screws. The recessed structure helps reduce water intrusion while keeping manufacturing costs low.
2. Butyl Rubber Sealing
How It Works
A non-hardening butyl rubber sealant is heated and applied between the lens and housing. Once cooled, it forms a waterproof seal.
Advantages
- Components can often be separated for repairs
- Suitable for retrofits and modifications
- Easier to service than welded lamps
Disadvantages
- Water resistance depends heavily on sealant quality
- Proper installation is critical
- Moderate waterproof performance
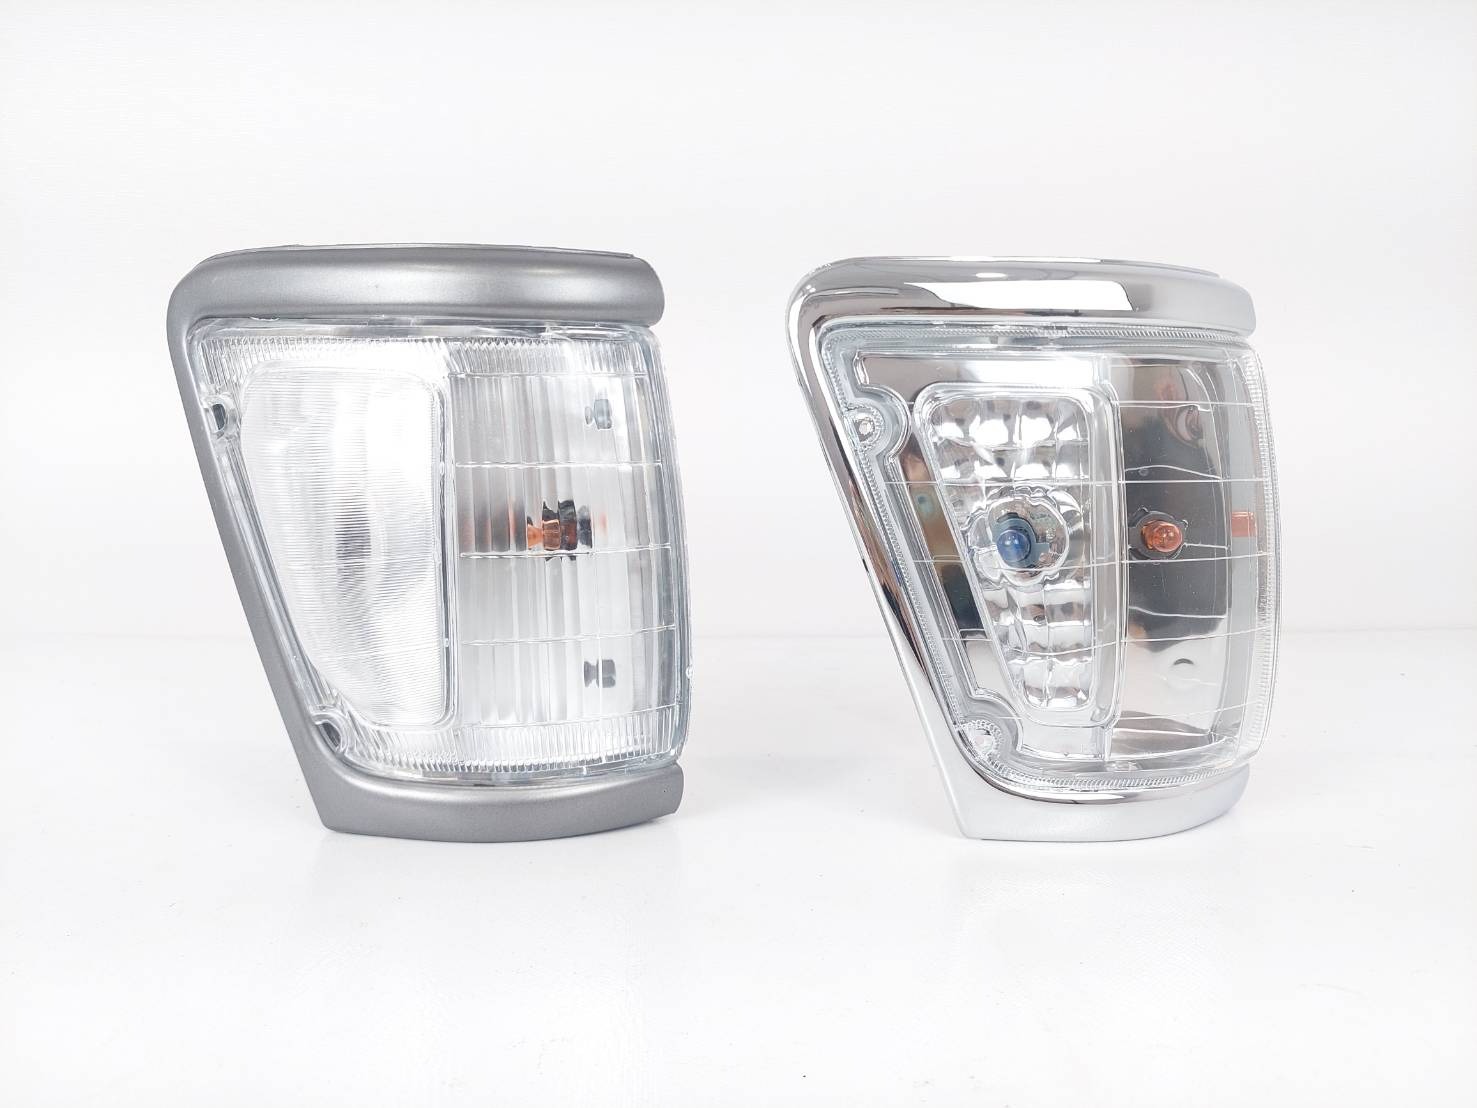
Example
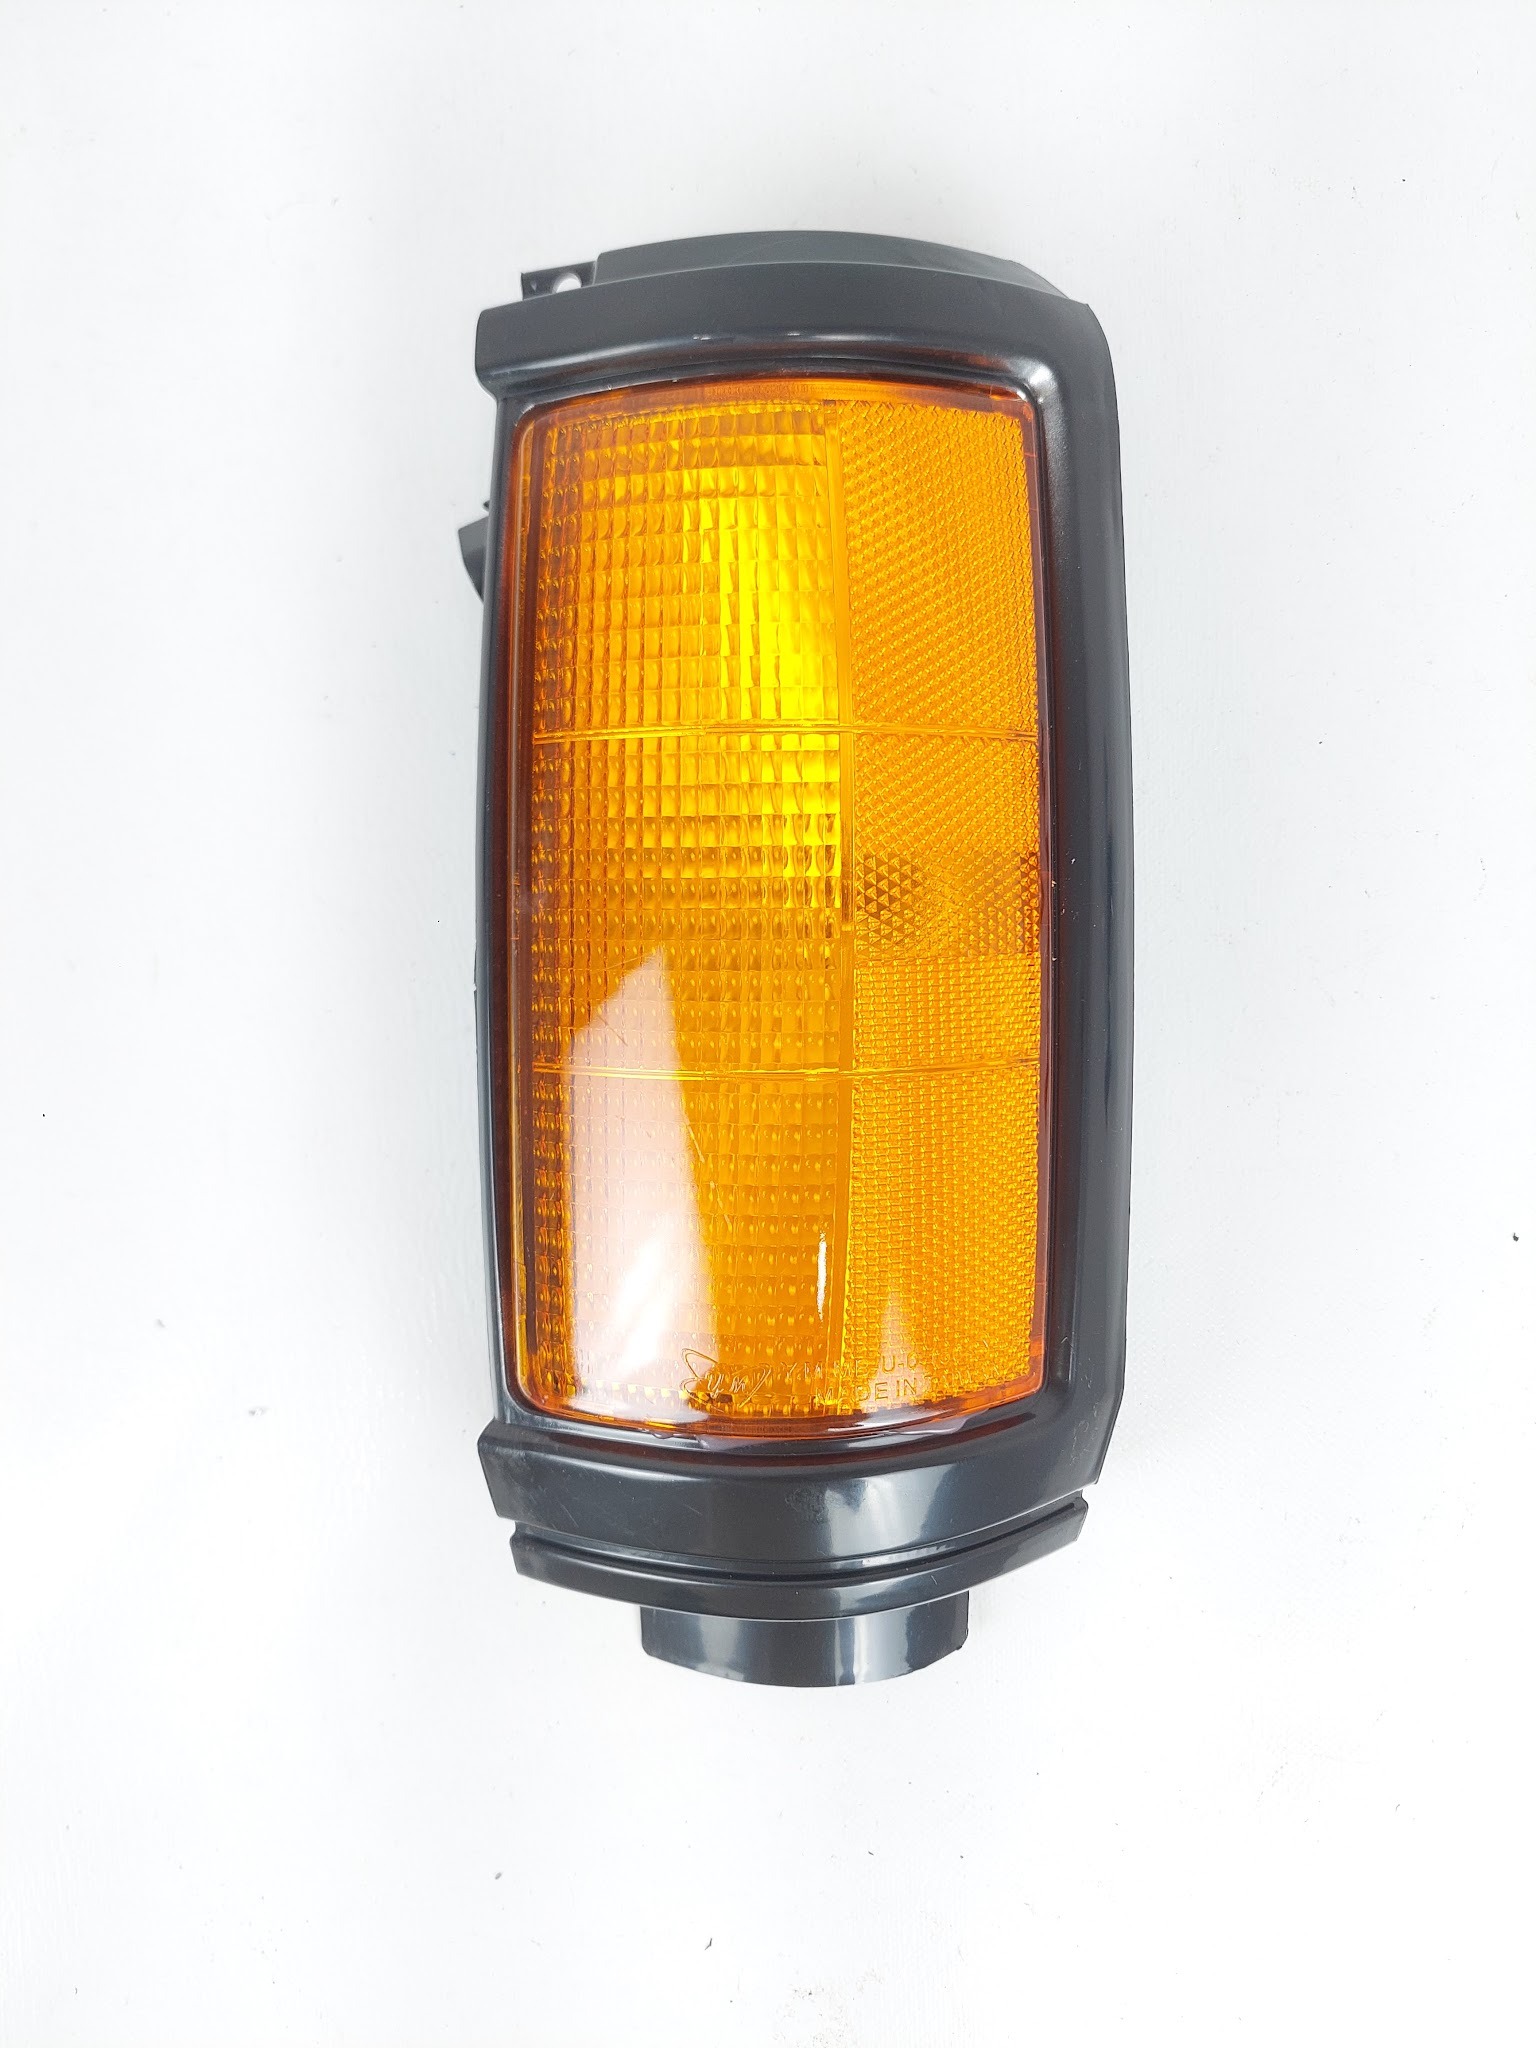
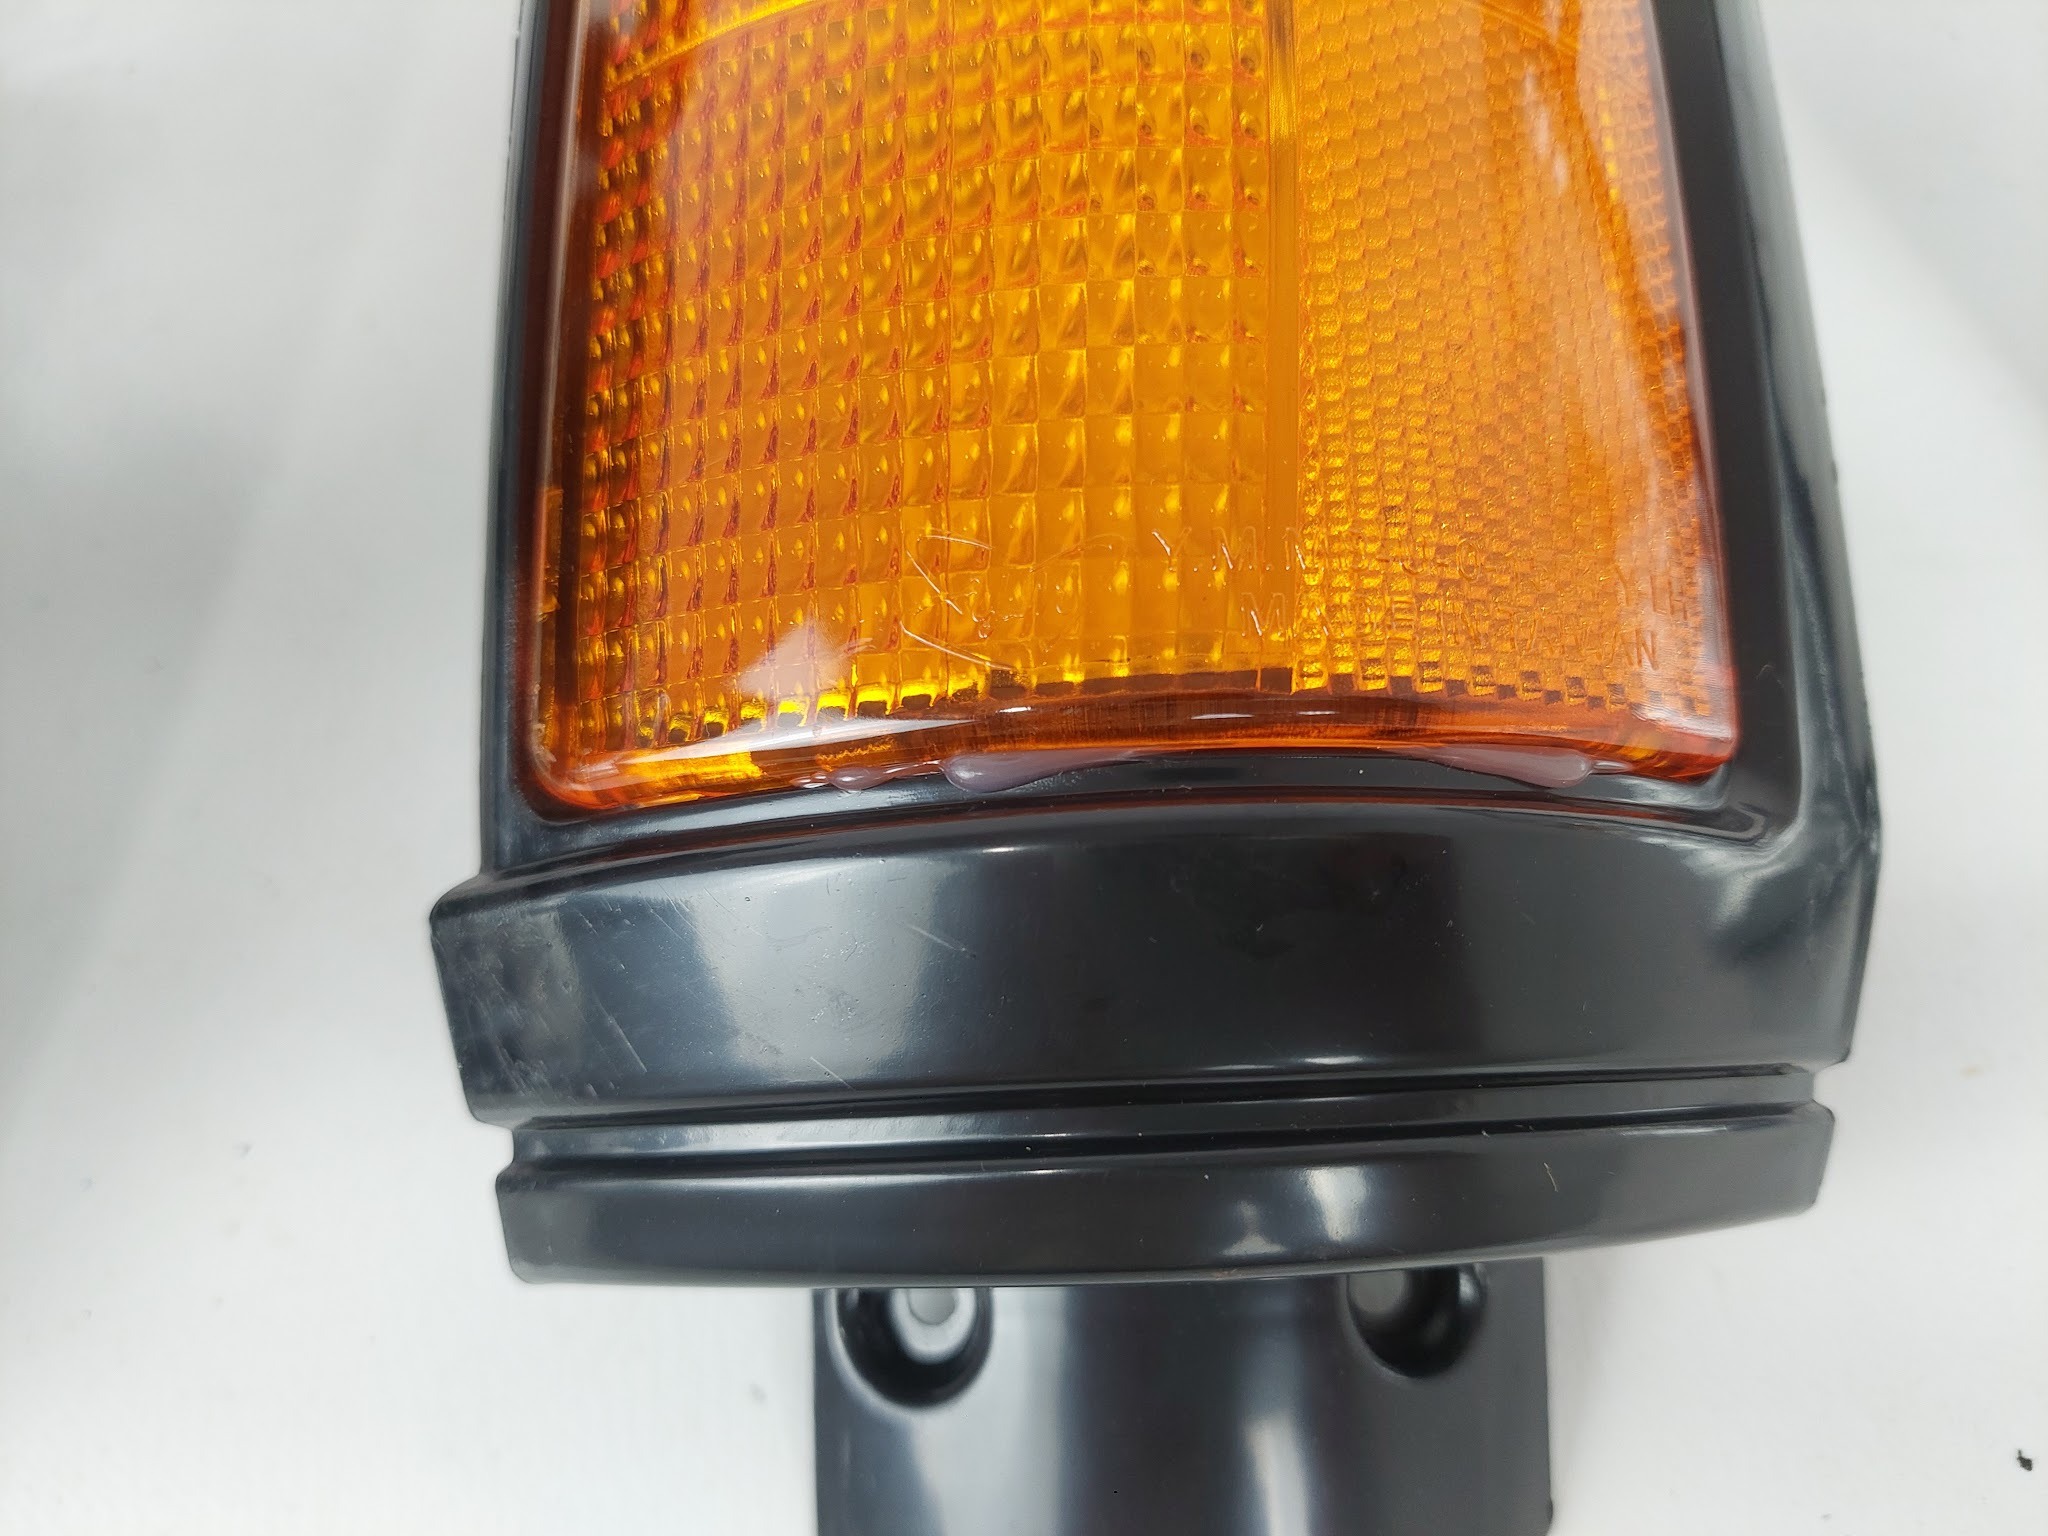
Dodge RAM 50 / Mitsubishi Mighty Max 1987 Corner Lamp
OEM Numbers:
- MB527081
- MB527082
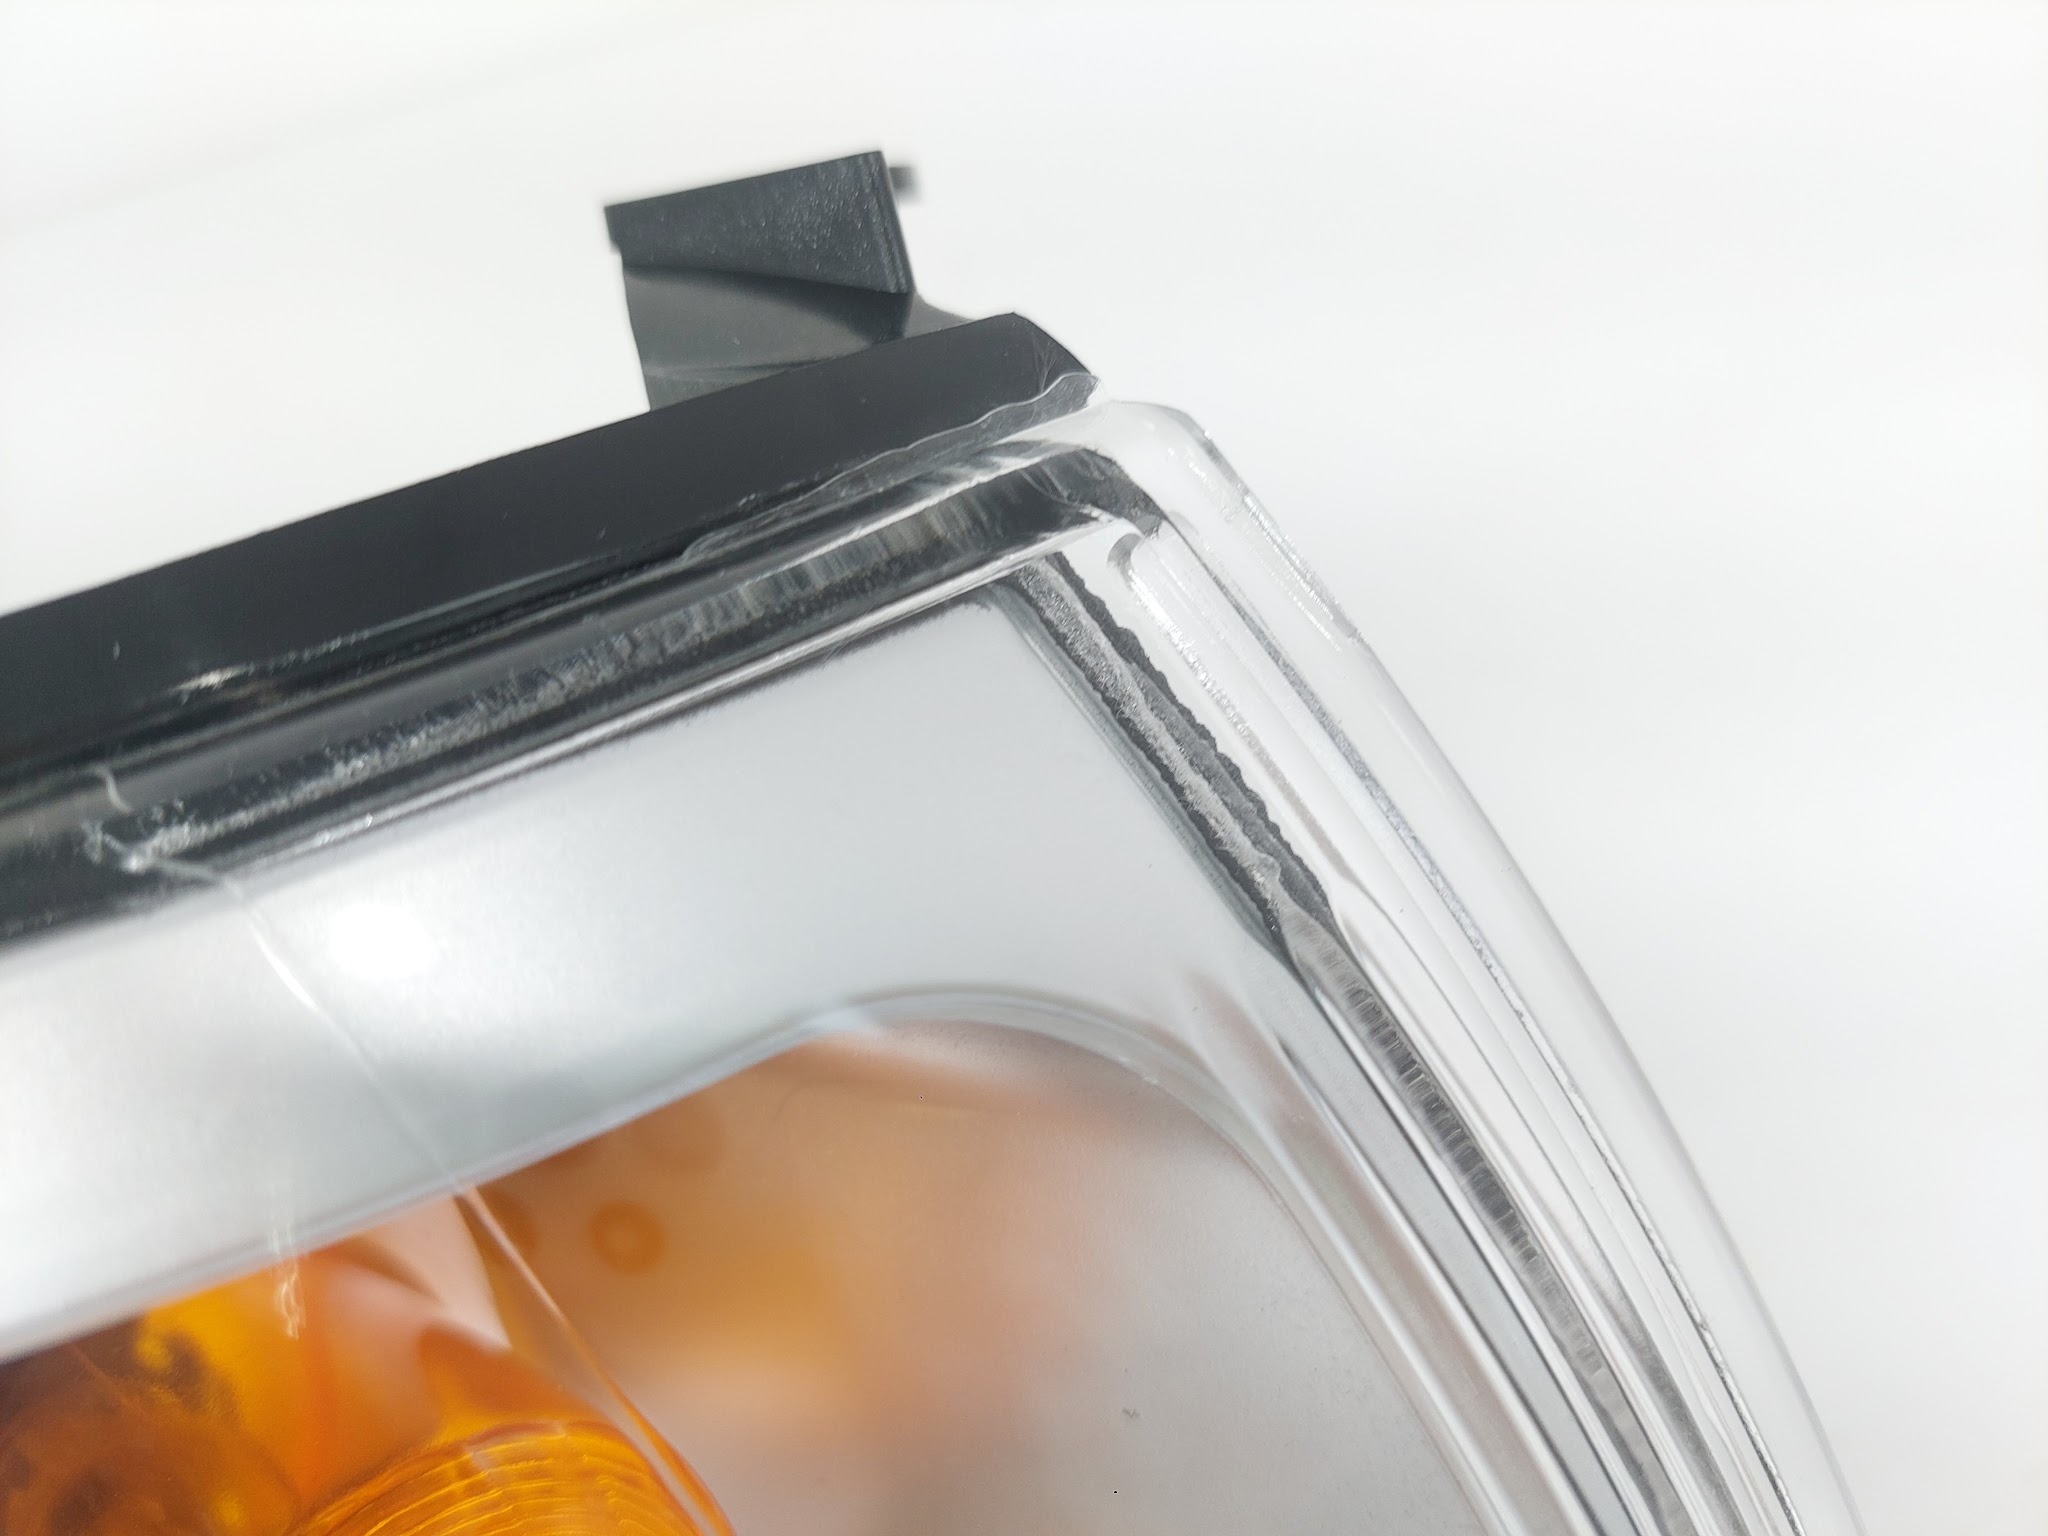
In many lamps using butyl rubber sealing, excess sealant can often be seen around the seam. This visible sealant is evidence of the sealing process and one of the easiest ways to identify this type of construction.
3. Ultrasonic Welding
How It Works
Ultrasonic welding uses high-frequency vibrations (typically above 20 kHz) to generate frictional heat at the contact surface. The plastic melts momentarily and permanently bonds together as it cools.
Advantages
- Excellent waterproof performance
- Extremely reliable sealing
- Low risk of moisture intrusion
Disadvantages
- Not designed to be disassembled
- Lens replacement is generally impossible
- If the lens becomes damaged or heavily oxidized, the entire lamp assembly must be replaced
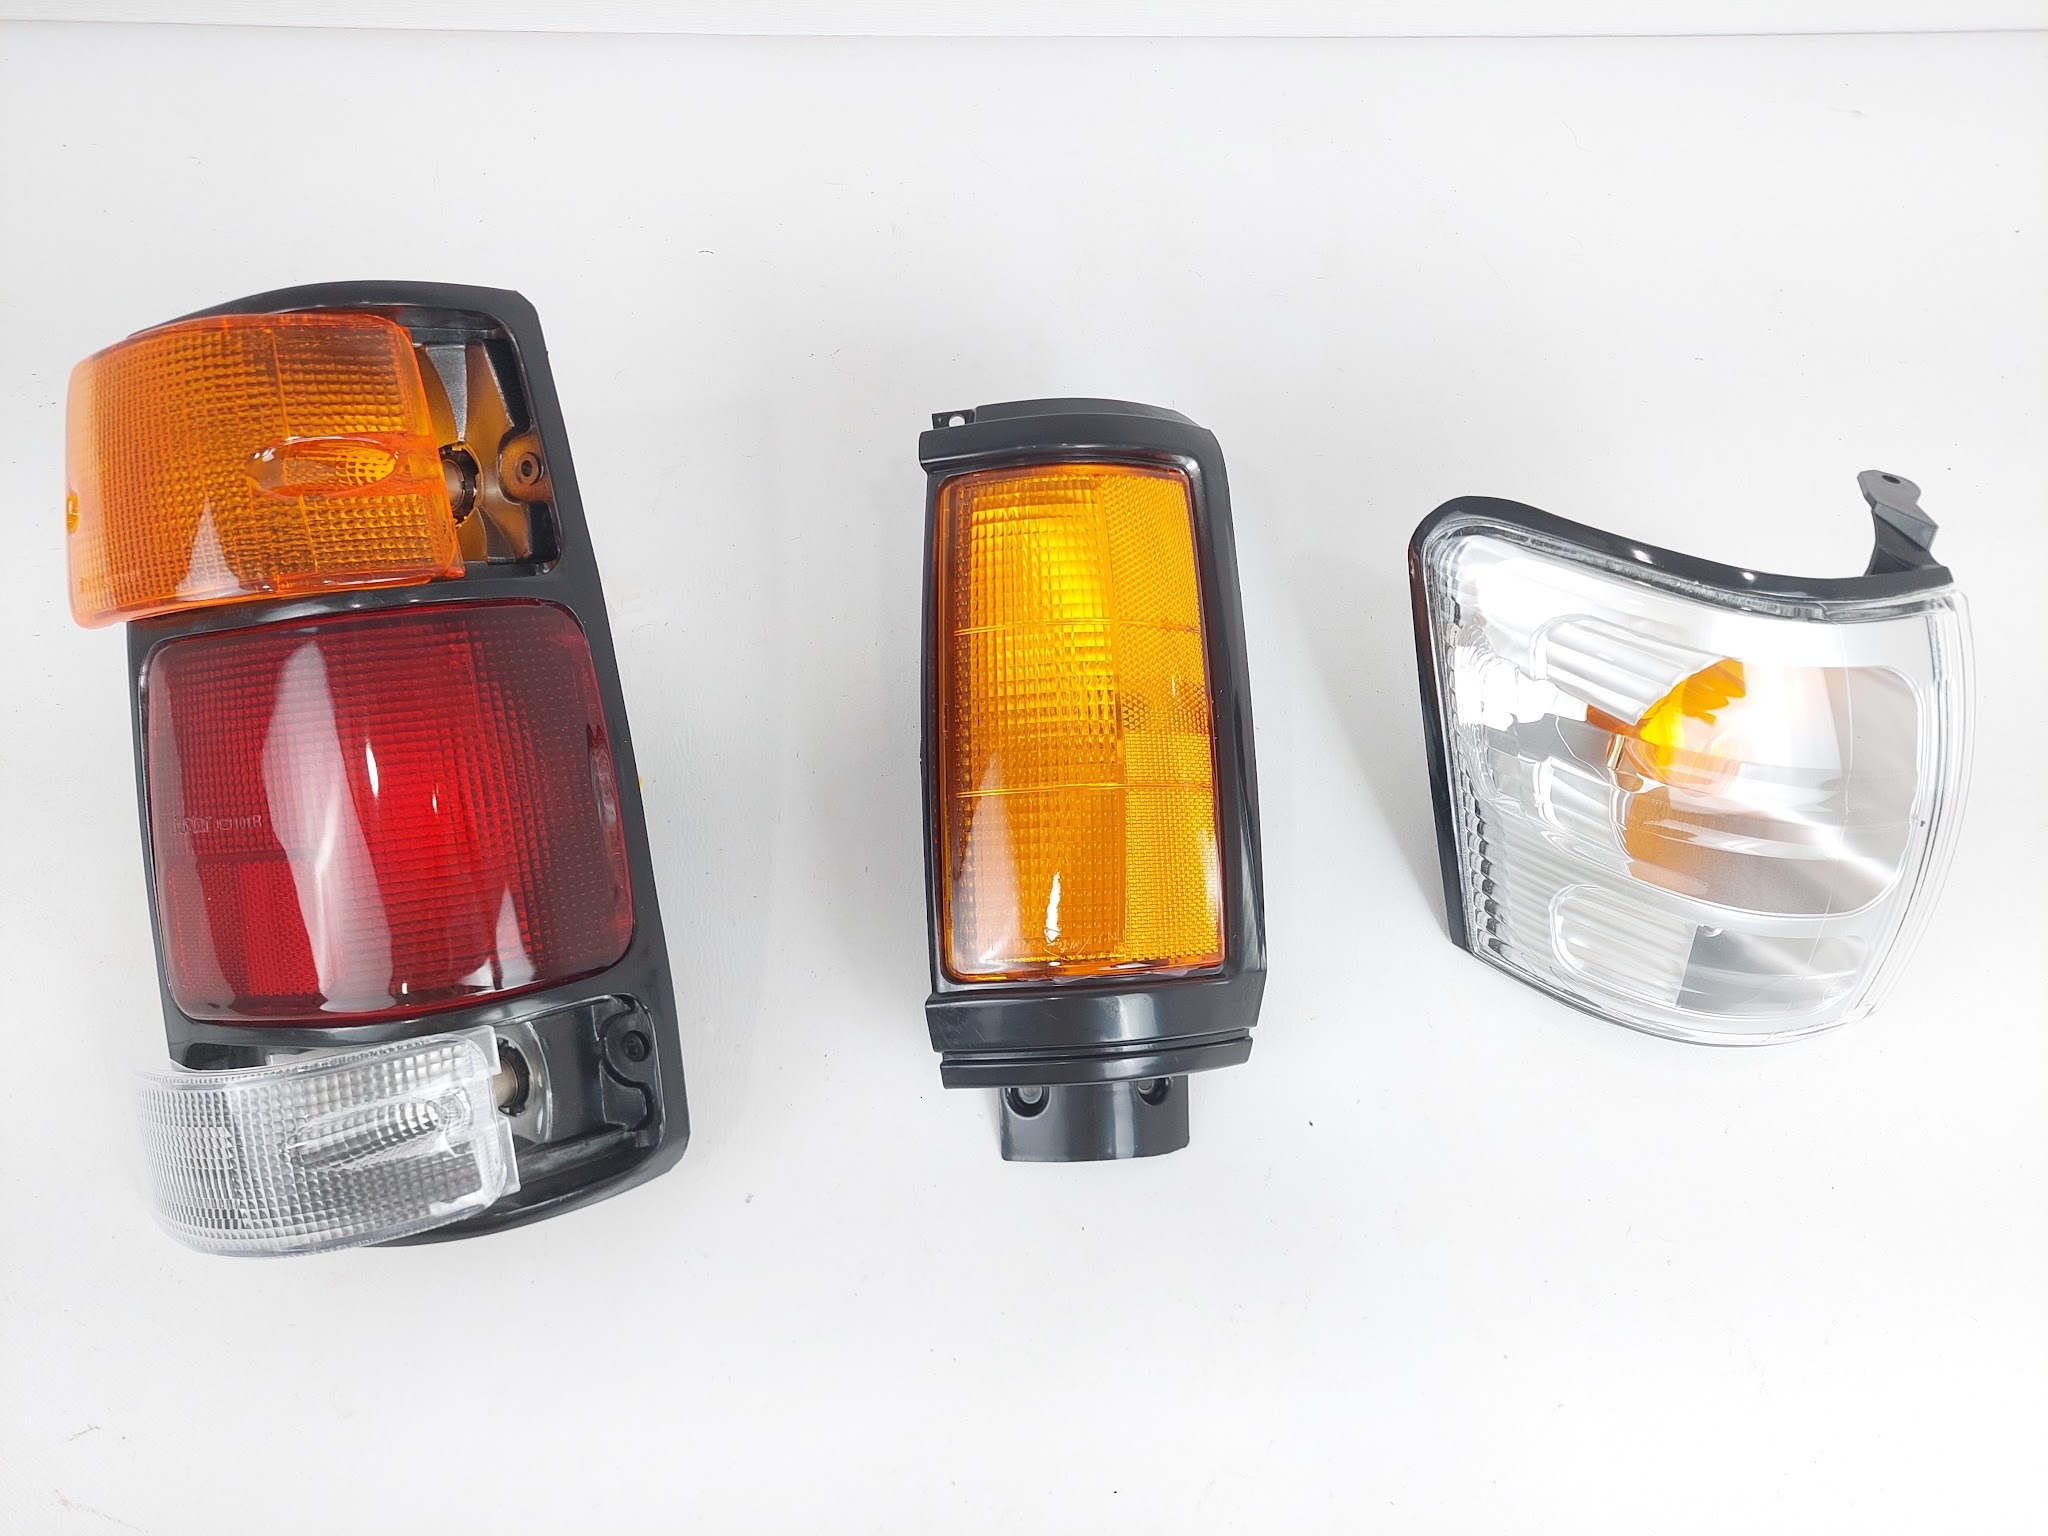
Example
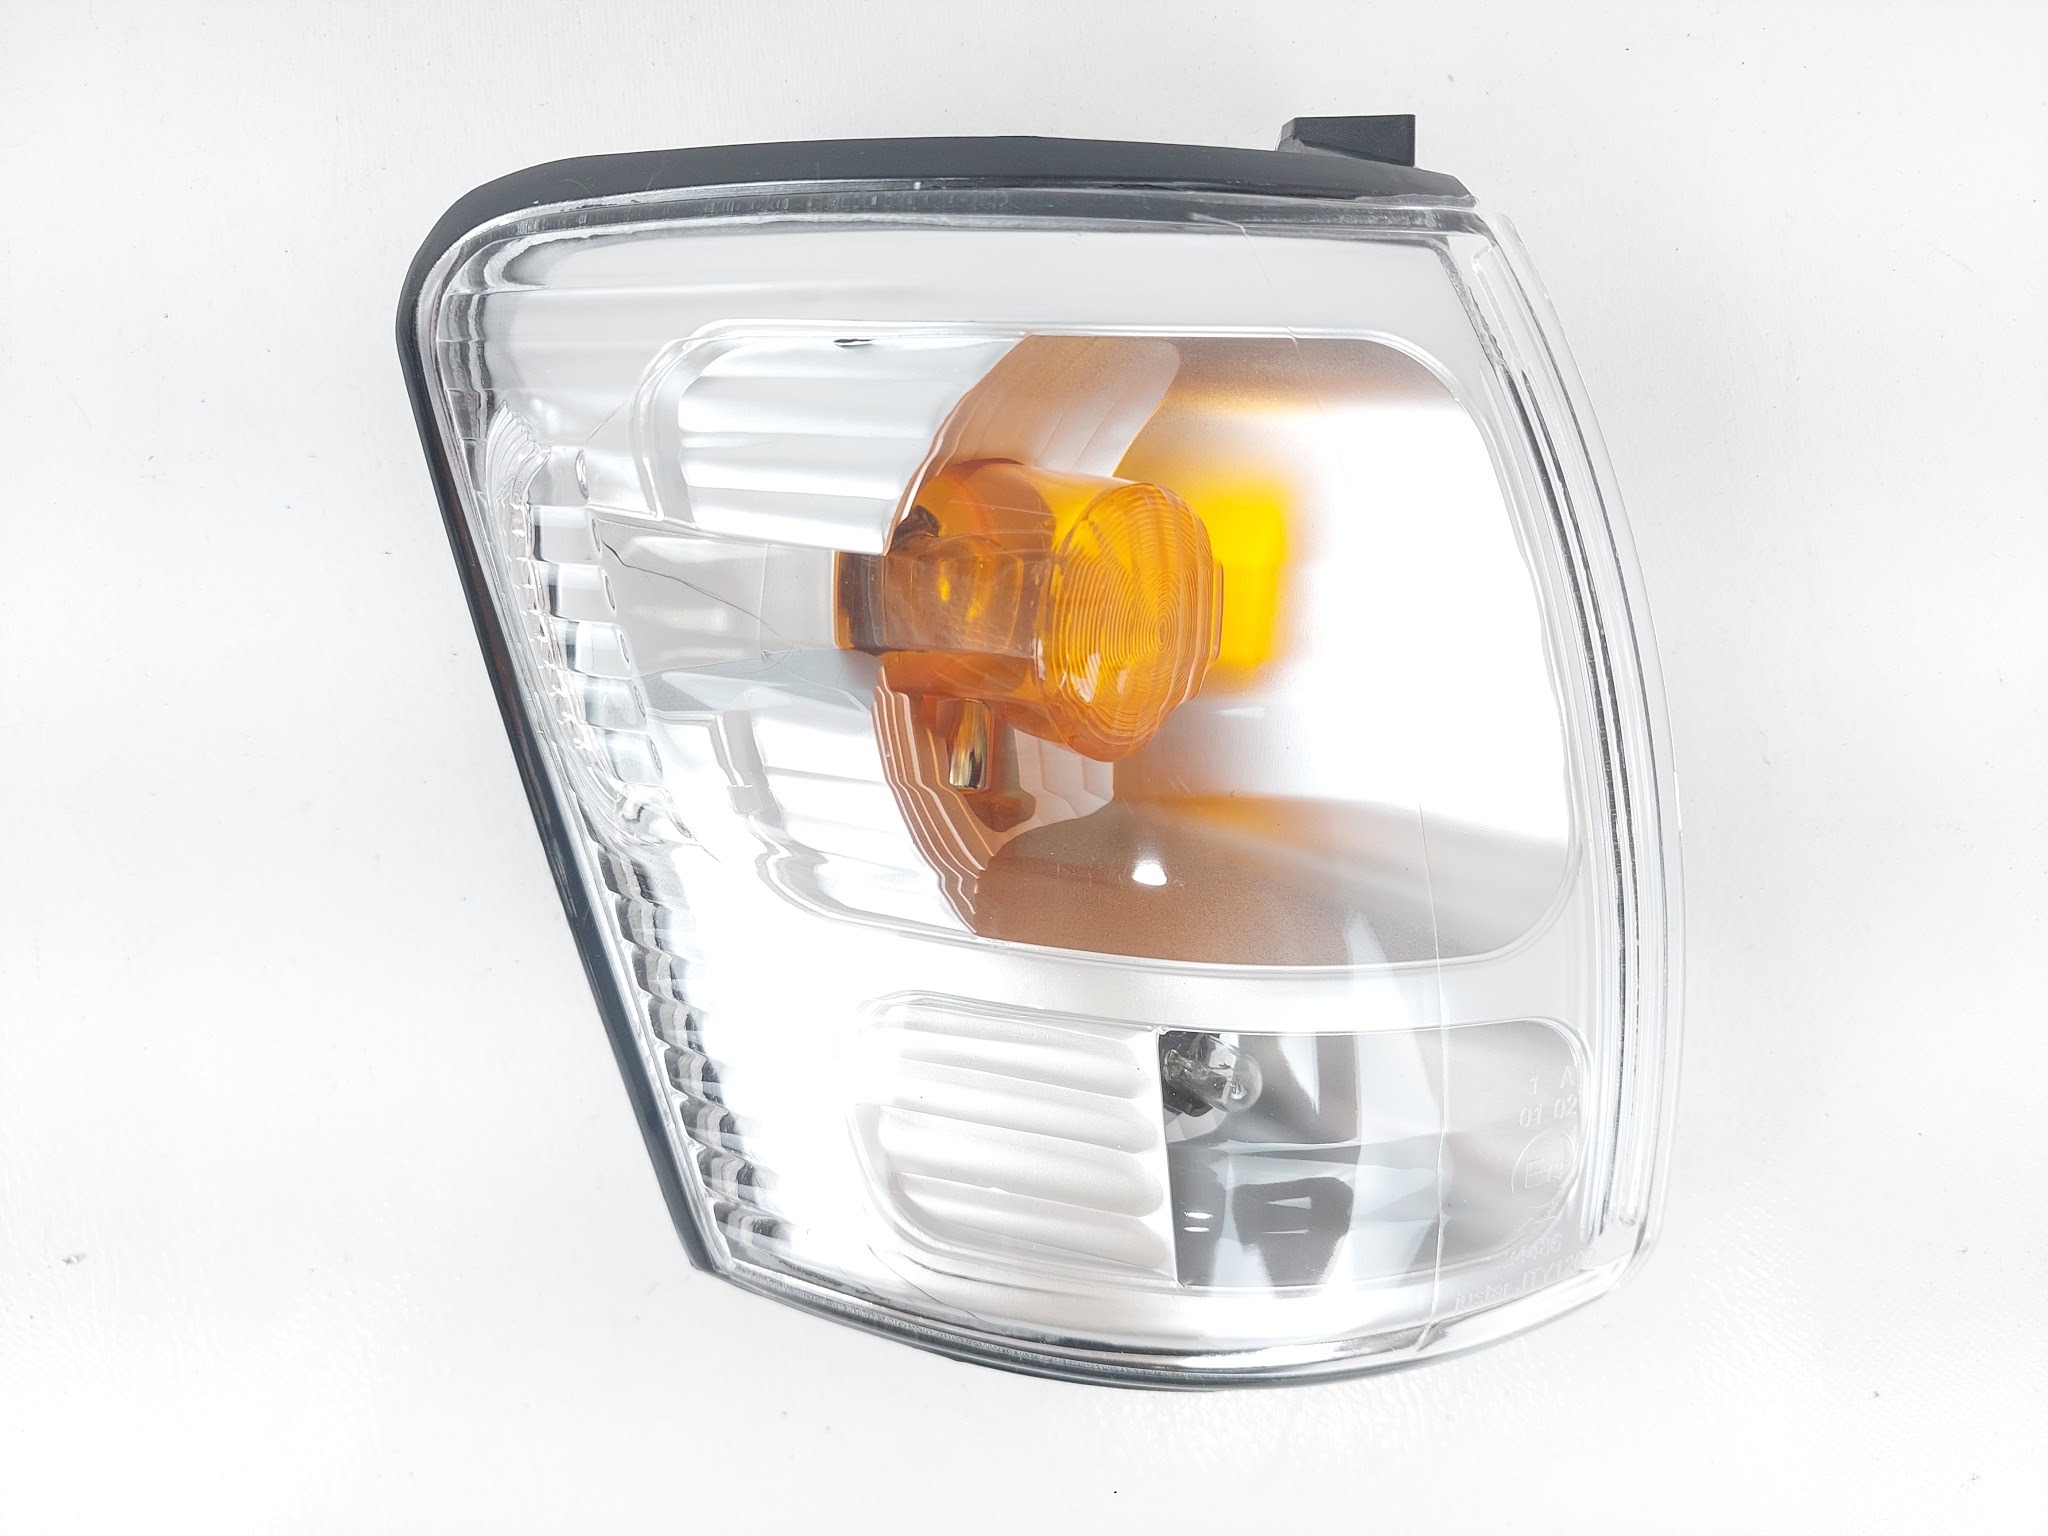
Toyota Hilux 2001 Corner Lamp
OEM Numbers:
- 81521-35280
- 81511-35290
- 81520-04100
- 81510-04100
Ultrasonically welded lamps often display an irregular melted plastic seam around the perimeter. This distinctive welded edge is a clear indication that the assembly was permanently bonded during manufacturing.
Comparison Chart
| Feature | Screw-Fastened | Butyl Rubber | Ultrasonic Welding |
| Waterproof Performance | Fair | Good | Excellent |
| Lens Replacement Available | Yes | No | No |
| Serviceable / Rebuildable | Yes | Yes | No |
| Cost | Low | Moderate | High |
To circle back to the beginning—why did I say it is possible but highly discouraged? The reason comes down to the sealant. Although it is technically feasible, standard DIY installations often result in incomplete sealing, which easily leads to water leaks.
Choosing the Right Solution
There is no perfect sealing method—each serves a different purpose.
For commercial vehicles, pickups, or work trucks, owners often prioritize low repair costs and ease of maintenance. In these cases, screw-fastened or butyl-sealed lamps can be advantageous.
For modern passenger vehicles and SUVs, styling, durability, and long-term waterproof performance are usually more important. As a result, ultrasonic welding has become the industry standard despite its limited repairability.
So, if your lamp lens is damaged, the first question isn’t whether the lens can be removed—it’s how the lamp was originally sealed.
Understanding the sealing method will tell you immediately whether a repair is possible or whether the entire lamp assembly will need replacement.


